- Joined
- Aug 25, 2025
- Messages
- 69
- Time Online
- 12h 26m
- Reputation
- 229
*PLEASE NOTE*
if you have severe acne scars and/or other severe skin conditions, please do visit a professional; you are better off, and its worth the money.
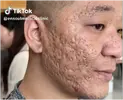
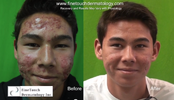
examples of severe acne scarring:
EQUIPMENT YOU WILL NEED:
BEST DERMA PEN BRANDS:
GUIDE:
*NOTICE: Derma Pen should not exceed 1.5mm for at home procedures, 2.0mm is rarely used even at clinical levels never mind at home; for under eyes and nose, do not exceed 0.5mm*
Step 1: Place Derma Pen cartridge in isopropyl alcohol for 12-24 hours before procedure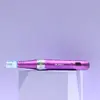
 Step 2: maintaining hygiene,
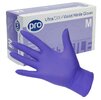
place on your nitrile gloves
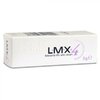 Step 3: If you are using numbing cream,
put it on your face 30-60 minutes before operating,
ensure the cream has Lidocaine, at least 4%
Step 4: Replace nitrile gloves to avoid contamination
 Step 5: Wipe off the numbing cream using Gauze Pads,
make sure all of it has been removed
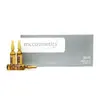 Step 5a: If you are using serums,
you can apply a collagen, vitamin, or anti-ageing serum now,
let it settle for 5-10 minutes
Step 6: Start using the Derma Pen on your face, in circular motions or in cross motions, make sure to reach the entire face, be careful on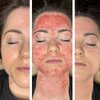 the nose and under eye area
Use the gauze pads to carefully wipe off any excess blood that starts to appear
A session should take 30 minutes for the whole face.
If you are targeting specific areas e.g. nose and under eyes only, spend no more than 10 minutes on the area
Skin is different across the board, some people's skin may look red, while others do not, some may only feel burning or dryness, so don't worry, as long as you have followed the steps, you have done it correctly
AFTERCARE:
*Final Note*
Most people depending on severity may need anywhere from 3-7 sessions to remove scarring, a procedure should only be done once every 30 days, some skin may take longer to heal, in which case every 1.5 - 2 months is ideal
Even if you don't have scarring or skin problems this is still an excellent way to maximise skin health
Much cheaper to do it at home rather than visiting a dermatologist, enjoy gorgeous skin!
if you have severe acne scars and/or other severe skin conditions, please do visit a professional; you are better off, and its worth the money.
examples of severe acne scarring:


EQUIPMENT YOU WILL NEED:
- Isopropyl Alcohol 99.9% (it is generally safe on skin)
- Derma Pen with 12 Needle Cartridges
- Lidocaine Numbing Cream (not mandatory, but just remember you will be poking needles into your face for long periods of time)
- Nitrile Gloves Powder-Free
- Gauze Pads
- Any serum you want to apply before microneedling
BEST DERMA PEN BRANDS:
- Dr Pen
- mccosmetics (mccosmetics also provide serums for micro needling operations which are used in clinics)
- Skinmate
GUIDE:
*NOTICE: Derma Pen should not exceed 1.5mm for at home procedures, 2.0mm is rarely used even at clinical levels never mind at home; for under eyes and nose, do not exceed 0.5mm*
Step 1: Place Derma Pen cartridge in isopropyl alcohol for 12-24 hours before procedure

 Step 2: maintaining hygiene,
 place on your nitrile gloves
 Step 3: If you are using numbing cream,
 put it on your face 30-60 minutes before operating,
ensure the cream has Lidocaine, at least 4%
Step 4: Replace nitrile gloves to avoid contamination
 Step 5: Wipe off the numbing cream using Gauze Pads,
 make sure all of it has been removed
 Step 5a: If you are using serums,
 you can apply a collagen, vitamin, or anti-ageing serum now,
let it settle for 5-10 minutes
Step 6: Start using the Derma Pen on your face, in circular motions or in cross motions, make sure to reach the entire face, be careful on
 the nose and under eye area
Use the gauze pads to carefully wipe off any excess blood that starts to appear
A session should take 30 minutes for the whole face.
If you are targeting specific areas e.g. nose and under eyes only, spend no more than 10 minutes on the area
Skin is different across the board, some people's skin may look red, while others do not, some may only feel burning or dryness, so don't worry, as long as you have followed the steps, you have done it correctly
AFTERCARE:
- Straight after the procedure, you can use a hyaluronic acid serum, cream, or mask to promote hydration
- Do not touch your face for 12 hours after procedure, and only wash with lukewarm water after the initial 12 hours
- Wait at least 24 hours before using anything from your skincare routine, waiting 48-72 hours is ideal but you can still use hyaluronic acid if you feel like you have to put on something
- After the 24-72 hour range, you can start reintroducing gentle products to your face, no harsh ingredients just yet
- After 1 week you can continue using any harsh products you may have, such as vitamin c, retinoids etc.
- Avoid any cold exposure (Cold Water, Icing face, etc.) as this can negatively affect healing, cold weather is fine
- When going out, use SPF and protect your face using either an umbrella or your hood
*Final Note*
Most people depending on severity may need anywhere from 3-7 sessions to remove scarring, a procedure should only be done once every 30 days, some skin may take longer to heal, in which case every 1.5 - 2 months is ideal
Even if you don't have scarring or skin problems this is still an excellent way to maximise skin health
Much cheaper to do it at home rather than visiting a dermatologist, enjoy gorgeous skin!


